

 Inventory
Create inventory & assign storage
With LiquidationRoute, you can create new inventory items, attach QR codes with custom templates, and assign storage locations via mobile QR scan or manual selection—all in one place.

Feature Tour
InventoryWith LiquidationRoute, you can create new inventory items, attach QR codes with custom templates, and assign storage locations via mobile QR scan or manual selection—all in one place.
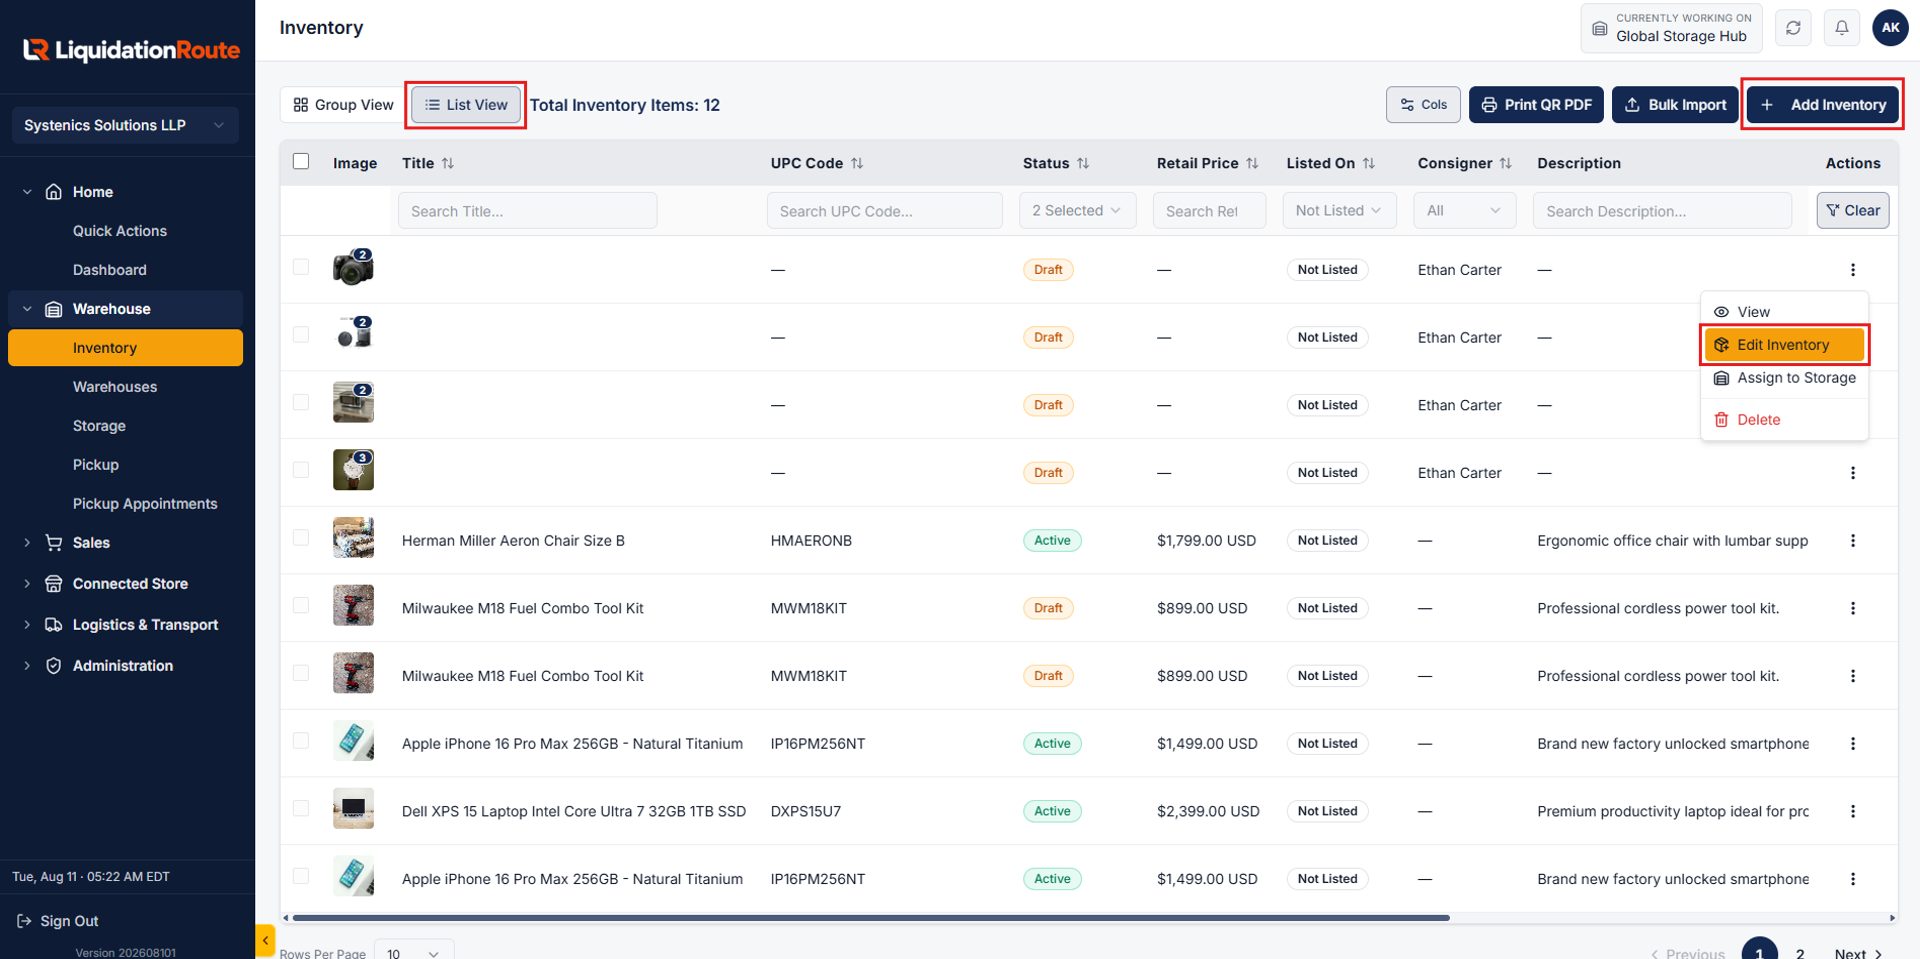
From the LiquidationRoute Dashboard, open Inventory and navigate to the List tab.
Click Add Inventory to create a new inventory item. If items have already been received from a Consignor, you can also locate them in the Inventory List and use the Action menu to edit the inventory.
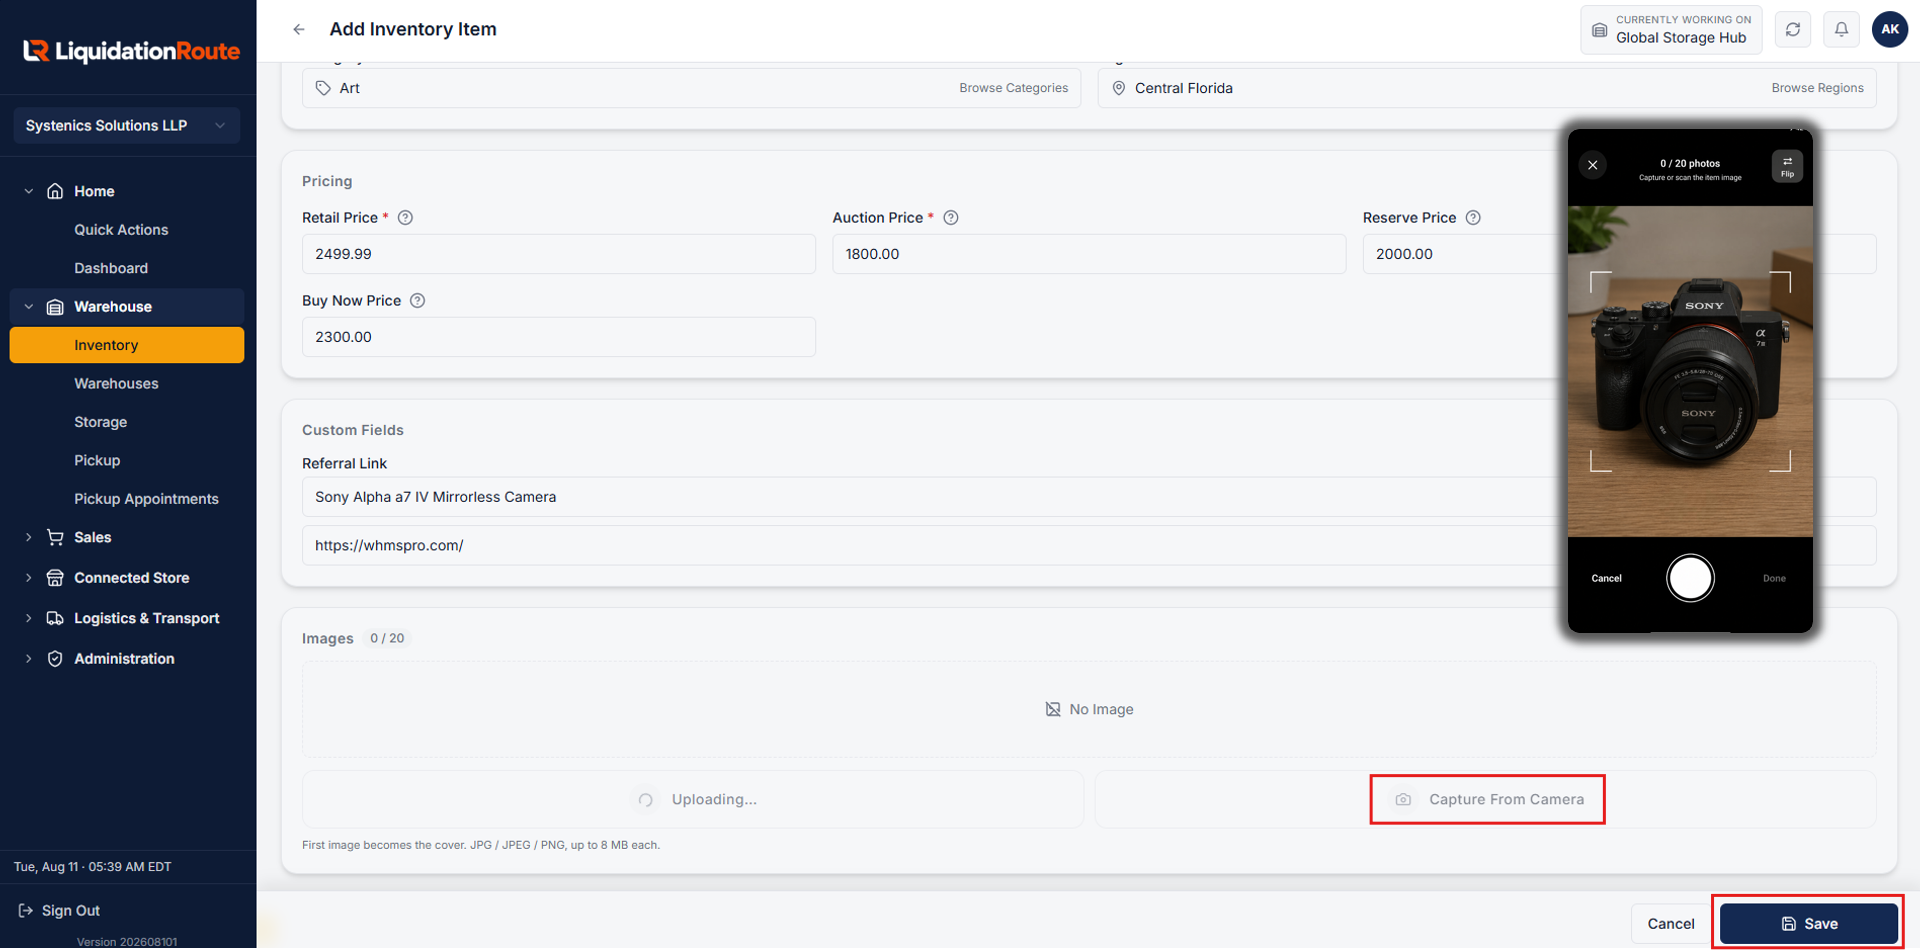
Fill out the comprehensive inventory intake form with required details across all sections:
Once all inventory information is complete, click Save to create the inventory record.
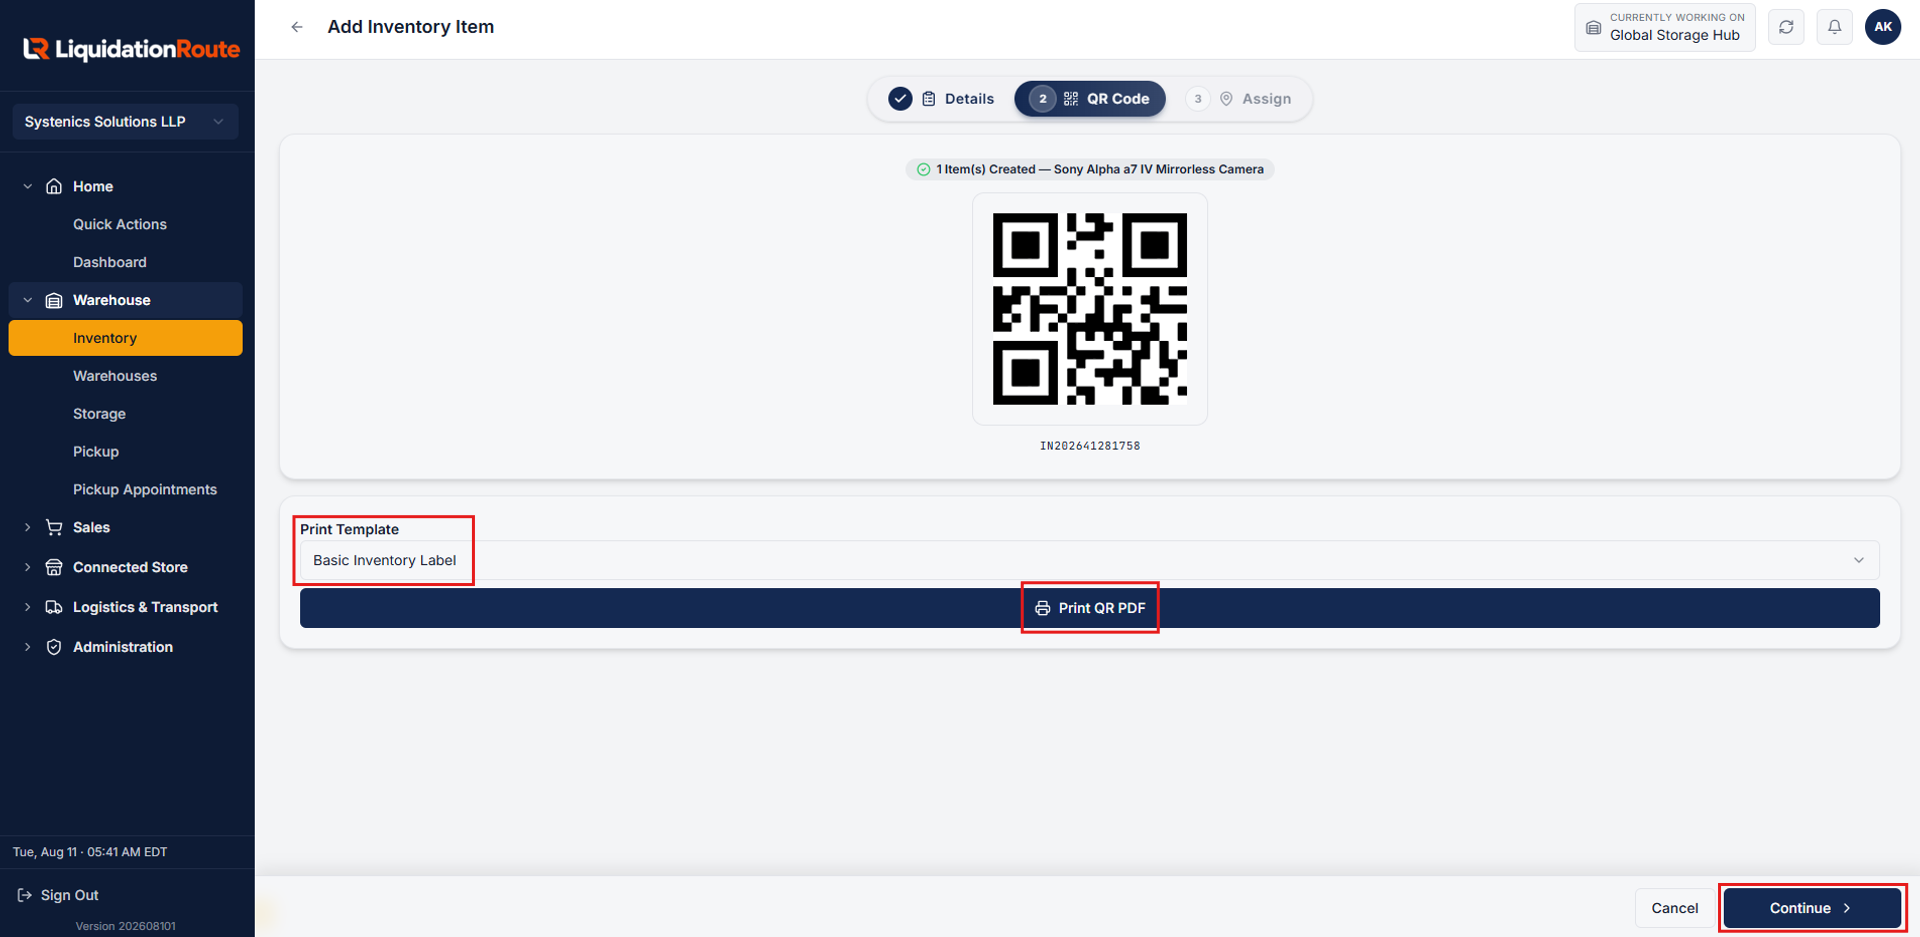
After creating the inventory item, LiquidationRoute automatically generates an Inventory ID and unique QR Code.
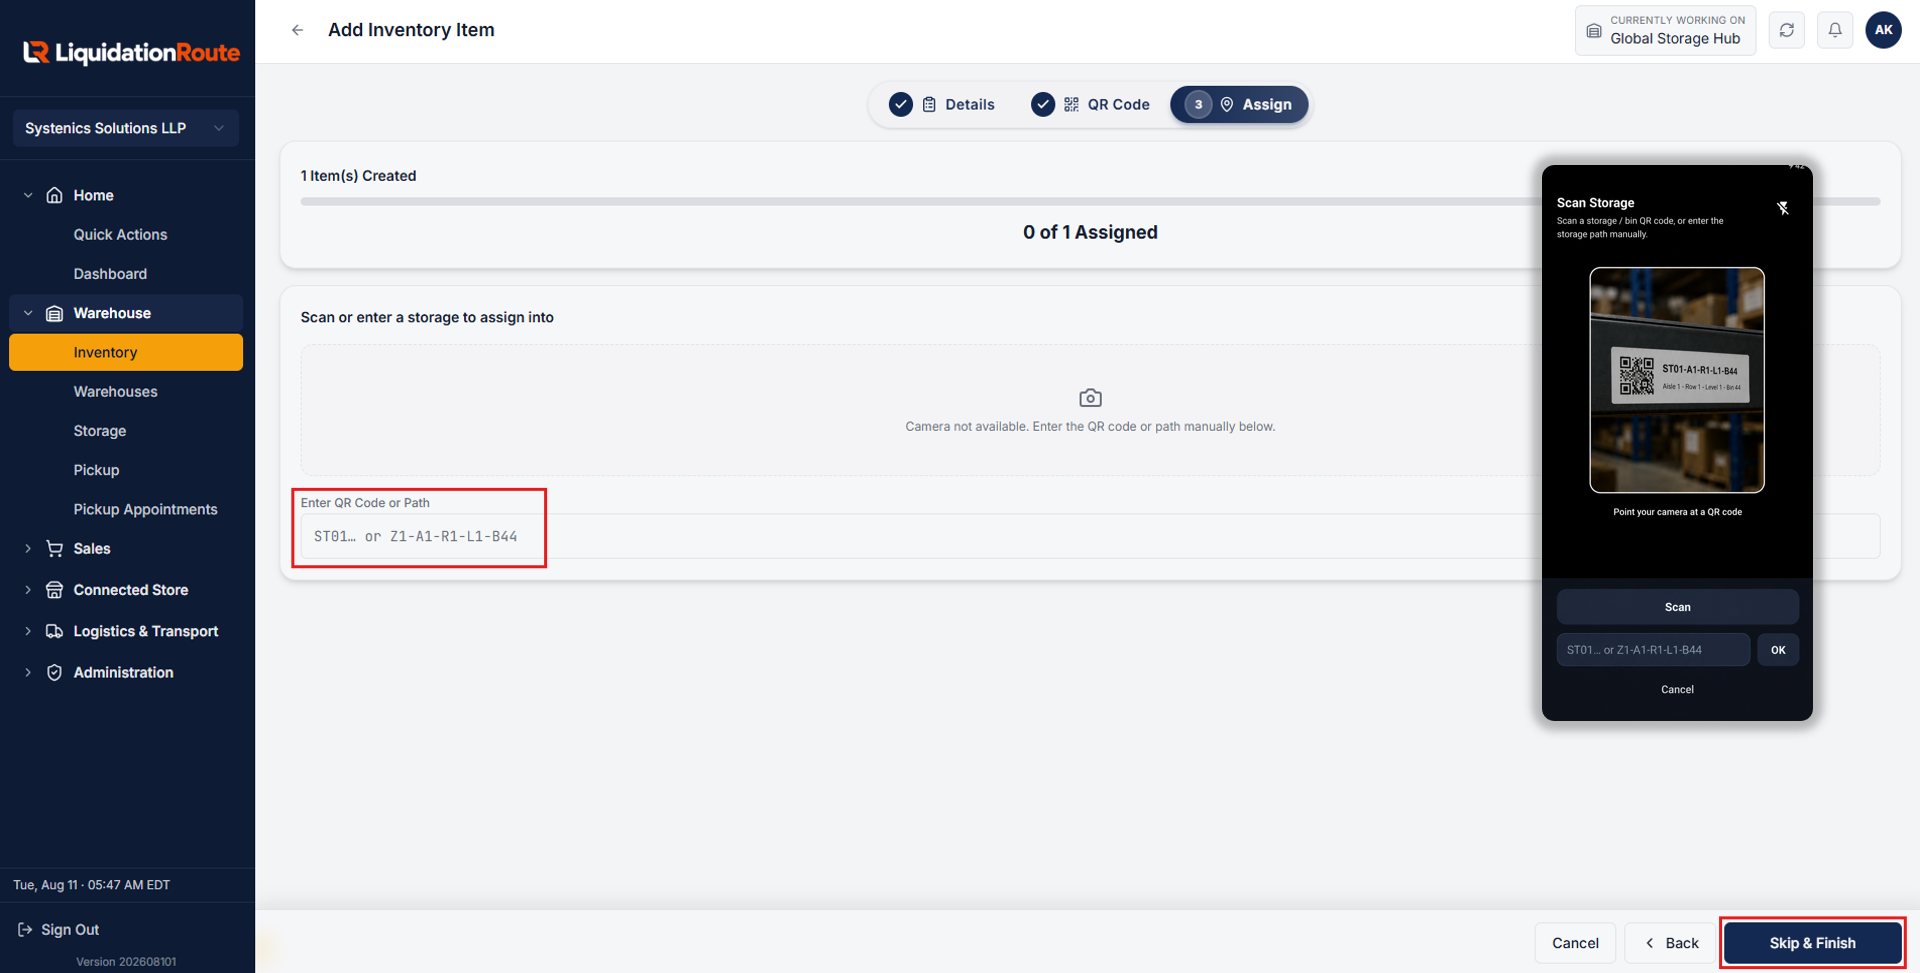
Assign the physical warehouse storage location to complete the intake workflow:
Clear answers on how this feature integrates into your daily liquidation workflow.
Yes. If you skip storage assignment during intake, you can assign it anytime from the Inventory List by selecting Action > Assign to Storage.
You can upload up to 20 images per inventory item either by uploading files on desktop or using mobile camera capture directly.
Under Administration > QR Template, you can define custom label dimensions, element positions, and sample fields. Once saved, click Print QR PDF to produce print-ready label sheets.
Yes. Using the LiquidationRoute mobile web interface or mobile app, scan the storage bin or rack QR code to instantly assign the item without manual typing.
See the whole flow, from manifest import through grading, lot building, and buyer pickup, in a 30-minute walkthrough.